


In this piece, I’ll teach you how to make an AI tool like this one with WordPress:

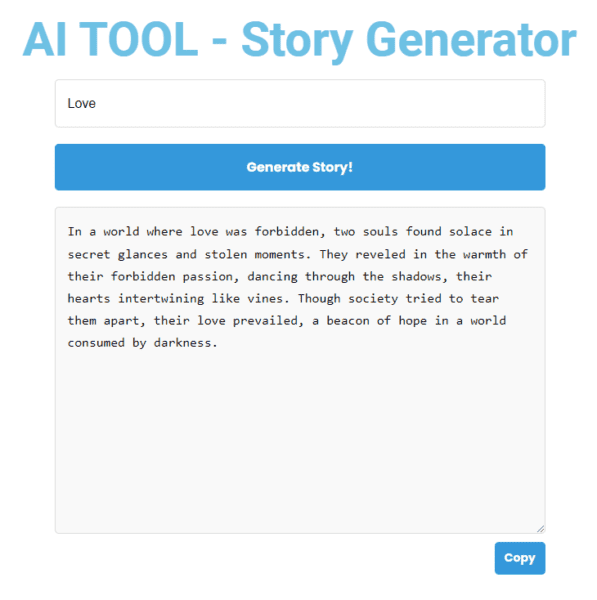
And you can test it live here: AI Story Generator Tool Test.
Why Develop Online Tools?
Online tools are more than a passing fad in an age of innovation and automation. They are multifaceted assets that increase the value, functionality, and appeal of a website. Here are some reasons why you should think about developing and incorporating an online tool into your website:
1- Increase Traffic Through
Engagement: Online tools, particularly those driven by AI, can entice and engage consumers, causing them to spend more time on your site.
SEO Advantages: Unique, interactive content can boost your website’s search engine rating, resulting in increased organic visitors.
Shareability: If your tool gives value, users are more likely to share it on social media, expanding your reach even further.
Building online tools such as PromoterKit and FreeeAIKit enabled me to reach millions of users worldwide in a short period of time. In less than a year, I’ve gone from zero to 100K monthly users! Especially if you take advantage of the power of Quick Win Keywords.
2- Lead Magnets
Capture Data: Tools that demand user input or registration can assist you in capturing crucial data such as email addresses.
Segmentation: You may segment your audience for more tailored marketing by examining how people use your tool.
Convert visitors into long-term clients or subscribers by providing a great tool for free or as a trial.
3- Make money
Subscription Models: You can limit access to premium features by offering tiered subscription models to meet the needs of different users.
Ad Revenue: If the tool has a significant user base, you can monetize it by showing tailored adverts to them.
B2B Collaborations: Your tool may attract business clients looking for white-label solutions or collaborations.
Grasp the Tool Structure
Developing AI tools on WordPress involves a sequence of 3 primary steps. Let’s delve into the intricacies of crafting this tool:
- Establish a WordPress Page: Initiate the process by crafting a fresh page within your WordPress site that will host the AI tool. This page serves as the user interface for engaging with the tool.
- Embed HTML Code: Incorporate specific HTML code to form the foundation of the tool page. This code kickstarts the communication with the OpenAI API.
- Execute a WordPress Function: Integrate a tailored WordPress function that captures user input from the HTML form and transmits it to OpenAI’s API. This function essentially acts as a conduit linking your website and OpenAI, facilitating seamless communication.
- Link to OpenAI API: The WordPress function establishes a connection with OpenAI’s API to generate text based on the user’s input.
Acquire an OpenAI API Key: To leverage any of OpenAI models, obtaining an API access key is a prerequisite. Here’s a step-by-step guide:
- Visit OpenAI’s API page and click on the “Signup” button.
- Follow the prompts to create an account, and complete the signup process by verifying your email.
- Once logged in, locate your API keys in the account dashboard.
- For more comprehensive instructions, refer to my detailed guide on initiating the GPT-4 API journey here.
Step 1: Integrate the API Call Function
In this initial phase, we’ll incorporate the PHP function essential for our tool to engage with the OpenAI API. To streamline this process, we’ll leverage the WPCode plugin within the WordPress environment.
Understanding the WPCode Plugin:
WPCode serves as a WordPress plugin designed to facilitate the seamless execution of PHP code snippets on your site. Its functionality eliminates the need to manually add custom snippets to your theme’s functions.php file.
Installation and Activation of the Code Snippets Plugin:
- Navigate to ‘Plugins > Add New’ from your WordPress dashboard.
- In the search bar, input ‘WPCode.’
- Locate the plugin in the search results and click ‘Install Now,’ followed by ‘Activate.’
Incorporating the OpenAI API Call:
Once the plugin is activated, follow these steps to integrate your API call:
- Go to ‘Code Snippets > Add New’ from your WordPress dashboard.
- Provide a name for your new snippet in the ‘Title’ field, such as “OpenAI API Call.”
- Set the Code Type to PHP.
- In the ‘Code’ text box, insert your PHP code. Here’s an illustrative example:
function openai_generate_text() {
    // Get the topic from the AJAX request
    $prompt = $_POST['prompt'];

    // OpenAI API URL and key
    $api_url = 'https://api.openai.com/v1/chat/completions';
    $api_key = 'sk-XXX';  // Replace with your actual OpenAI API key

    // Headers for the OpenAI API
    $headers = [
        'Content-Type' => 'application/json',
        'Authorization' => 'Bearer ' . $api_key
    ];

    // Body for the OpenAI API
    $body = [
        'model' => 'gpt-3.5-turbo',
        'messages' => [['role' => 'user', 'content' => $prompt]],
        'temperature' => 0.7
    ];

    // Args for the WordPress HTTP API
    $args = [
        'method' => 'POST',
        'headers' => $headers,
        'body' => json_encode($body),
        'timeout' => 120
    ];

    // Send the request
    $response = wp_remote_request($api_url, $args);

    // Handle the response
    if (is_wp_error($response)) {
        $error_message = $response->get_error_message();
        wp_send_json_error("Something went wrong: $error_message");
    } else {
        $body = wp_remote_retrieve_body($response);
        $data = json_decode($body, true);

        if (json_last_error() !== JSON_ERROR_NONE) {
            wp_send_json_error('Invalid JSON in API response');
        } elseif (!isset($data['choices'])) {
            wp_send_json_error('API request failed. Response: ' . $body);
        } else {
            wp_send_json_success($data);
        }
    }

    // Always die in functions echoing AJAX content
   wp_die();
}

add_action('wp_ajax_openai_generate_text', 'openai_generate_text');
add_action('wp_ajax_nopriv_openai_generate_text', 'openai_generate_text');
This code defines a PHP function named openai_generate_text, triggered upon a request to WordPress with the action openai_generate_text.
The function communicates with OpenAI’s API to generate text based on a user-provided prompt. It retrieves the prompt from the POST request:
phpCopy code
$prompt = $_POST['prompt'];
The last two lines of the code link the function to the wp_ajax_openai_generate_text and wp_ajax_nopriv_openai_generate_text actions, ensuring its execution upon a request with the action openai_generate_text in WordPress.
Finalize by ensuring the script runs universally and publish the code snippet.
Step 2: Construct the Tool Page
Now that our API function is set, let’s proceed to create a new page on our WordPress site to host our AI tool. Elementor, a popular WordPress page builder, will be our tool of choice for page creation.
📣 Note: The choice of builder is flexible; what matters is the ability to incorporate custom HTML code onto the page.
Installing and Activating Elementor:
- Navigate to ‘Plugins > Add New’ from your WordPress dashboard.
- In the search bar, input ‘Elementor.’
- Locate the plugin in the search results and click ‘Install Now,’ followed by ‘Activate.’
Generating a New Page with Elementor:
- Visit ‘Pages > Add New’ from your WordPress dashboard.
- Assign a title to your page, such as “AI Tool.”
- Click ‘Edit with Elementor’ to commence the page design.
Incorporating Custom HTML in Elementor:
To integrate custom HTML in Elementor, employ the following steps:
- On the Elementor editor page, spot a sidebar on the left with various icons. Click on the one resembling a grid or matrix.
- This action reveals a list of widgets; search for the ‘HTML’ widget.
Here, you can insert your custom HTML code for the AI tool. The provided basic example includes code for an input field, a button, and a text area for output results.
For your convenience, a comprehensive HTML, JS, and CSS Code snippet is provided, covering input fields, buttons, and result display elements. Copy and paste the code directly:
htmlCopy code
<div id="text-generation-tool">
    <input type="text" id="topic" placeholder="Your Topic...">
    <button id="generate-button">Generate Story!</button>
    <div id="result-container" style="display: none;">
        <div class="result-wrapper">
            <div class="result-content">
                <textarea id="result" readonly></textarea>
            </div>
            <div class="copy-button-container">
                <button id="copy-button">Copy</button>
            </div>
        </div>
    </div>
    <div id="loading" class="loader" style="display: none;"></div>
</div>

<style>
    /* Basic styles for the text generation tool */
    #text-generation-tool {
        width: 100%;
        max-width: 600px;
        margin: 0 auto;
        font-family: Arial, sans-serif;
    }

    #topic {
        width: 100%;
        padding: 15px;
        margin-bottom: 20px;
        font-size: 16px;
        border-radius: 5px;
        border: 1px solid #ddd;
    }

    #generate-button {
        display: block;
        width: 100%;
        padding: 15px;
        margin-bottom: 20px;
        font-size: 16px;
        border: none;
        border-radius: 5px;
        color: #fff;
        background-color: #3498db;
        cursor: pointer;
        transition: background-color 0.3s ease;
    }

    #generate-button:hover {
        background-color: #2980b9;
    }

    #result-container {
        display: none;
        margin-bottom: 20px;
    }

    .result-wrapper {
        position: relative;
        overflow: hidden;
    }

    .result-content {
        display: flex;
    }

    #result {
        flex: 1;
        height: 400px;
        padding: 15px;
        font-size: 16px;
        border-radius: 5px;
        border: 1px solid #ddd;
        background-color: #f9f9f9;
    }

    .copy-button-container {
        margin-top: 10px;
        text-align: right;
    }

    #copy-button {
        padding: 8px 12px;
        font-size: 14px;
        border: none;
        border-radius: 5px;
        color: #fff;
        background-color: #3498db;
        cursor: pointer;
        transition: background-color 0.3s ease;
    }

    #copy-button:hover {
        background-color: #2980b9;
    }

    /* CSS for the loader */
    .loader {
        display: block;
        margin: 50px auto;
        border: 16px solid #f3f3f3; /* Light grey */
        border-top: 16px solid #3498db; /* Blue */
        border-radius: 50%;
        width: 50px;
        height: 50px;
        animation: spin 1s linear infinite;
    }

    @keyframes spin {
        0% { transform: rotate(0deg); }
        100% { transform: rotate(360deg); }
    }
</style>
This pre-generated code includes styles for the text generation tool, input fields, buttons, and loading animations.
By the way, I whipped up this code with ChatGPT in around 5 minutes! Feel free to use it as a foundation for any tool creation. For modifications, such as altering the input field’s placeholder text, adjust the relevant line:
htmlCopy code
<input type="text" id="topic" placeholder="Your Topic...">
Moreover, you can input this code into ChatGPT and seek its assistance in making modifications. Here’s an example:
Prompt: “Update the input box to a dropdown list where I can select one of the following: (love, help, friendship)”
After running the prompt, ChatGPT produced the modified code:
htmlCopy code
<select id="topic"> <option value="" selected disabled>Your Topic...</option> <option value="love">Love</option> <option value="help">Help</option> <option value="friendship">Friendship</option> </select>
The versatility of AI models like ChatGPT is astounding, making prompt engineering a sought-after skill. If you’re keen on delving deeper into this realm, explore my comprehensive course on prompt engineering available here.
Save Your Page:
Once the code is pasted, click ‘Update’ to save your changes. Bravo! You’ve successfully crafted a page for your AI tool and incorporated essential HTML elements. The subsequent step involves linking this page to our OpenAI API function.
Step 3: Linking the Page to the API Function
Now that both our API function and tool page are ready, it’s time to establish the connection, and for this, we’ll utilize JavaScript (JS) code.
What’s the Purpose of This JavaScript Code?
This JS code sets up an event listener on the ‘Generate Story!’ button. When clicked, it collects the user-selected topic and sends it to our OpenAI API function using AJAX. During story generation, a loading spinner is displayed. Once the story is ready, it hides the loading spinner and showcases the result in the textarea. In case of an error, an error message is presented in the result textarea. The code also sets up an event listener on the ‘Copy’ button, enabling the user to copy the generated story to the clipboard.
Incorporating the JavaScript Code:
Here’s the essential JavaScript code to add:
javascriptCopy code
<script>
    document.getElementById("generate-button").addEventListener("click", function(e){
        e.preventDefault();


        var generateButton = document.getElementById("generate-button");

        if (generateButton.disabled) {
            return; // Prevent multiple clicks while content is being generated
        }

        generateButton.disabled = true;


        var topic = document.getElementById('topic').value;
        var prompt = "Generate a 3 sentence story about " + topic;
        var loading = document.getElementById('loading');
        var result = document.getElementById('result');
        var resultC = document.getElementById('result-container');


        loading.style.display = 'block';
        result.style.display = 'none'; // hide result textarea
        resultC.style.display = 'none';


        var formData = new FormData();
        formData.append('action', 'openai_generate_text');
        formData.append('prompt', prompt);

        fetch('/wp-admin/admin-ajax.php', {
            method: 'POST',
            body: formData
        })
        .then(response => response.json())
        .then(data => {
            loading.style.display = 'none';
            if(data.success) {
                result.value = data.data.choices[0].message.content;
                result.style.display = 'block'; // show result textarea
                resultC.style.display = 'block';
                generateButton.disabled = false;
            } else {
                result.value = 'An error occurred: ' + data.data;
                result.style.display = 'block'; // show result textarea
                resultC.style.display = 'block';
                generateButton.disabled = false;
            }
        })
        .catch(error => {
            loading.style.display = 'none';
            result.value = 'An error occurred: ' + error.message;
            result.style.display = 'block'; // show result textarea
            resultC.style.display = 'block';
            generateButton.disabled = false;

        });
    });

    var copyButton = document.getElementById('copy-button');
    copyButton.addEventListener('click', function() {
        var result = document.getElementById('result');
        result.select();
        document.execCommand('copy');
        alert('Copied to clipboard!');
    });
</script>
Pay attention to the prompt:
javascriptCopy code
var prompt = "Generate a 3 sentence story about " + topic;
In my example, it’s a basic prompt for clarity. In your scenario, tailor the prompt based on your AI Tool Logic. For instance, if creating a Domain Name Generator Tool, your prompt might look like this:
javascriptCopy code
Generate a list of 10 domain name ideas for a website about [topic], and provide a brief explanation for each suggestion.
For a more advanced approach, here’s a premium Power prompt for AI-generated Domain Names:
javascriptCopy code
Please generate 10 original and creative domain names specifically tailored for the [niche] niche, focusing on its main concepts and target audience. ... 8. Legality: Refrain from infringing on existing trademarks or brands.
Replace the prompt according to your tool’s purpose.
Integrating the JavaScript Code into Your Page:
- Open the Elementor editor for your tool page.
- Drag and drop the ‘HTML’ widget onto your page as before.
- Paste the JavaScript code into the ‘HTML Code’ box.
- Click ‘Update’ to save your changes.
Alternatively, you can paste the code within the existing HTML Code Box.
That’s it! Your tool page is now seamlessly connected to the OpenAI API function. Users can utilize the tool based on their selected topic. This integration enhances the user experience, making your AI tool functional and accessible.
Optimizing Our Tool
Once our tool is operational, the journey towards improvement is ongoing. Optimization involves refining the User Interface (UI) and implementing security measures such as captcha to enhance user experience and safeguard against bots.
The adaptability of modern AI, like ChatGPT, adds a fascinating dimension to this process. You can leverage ChatGPT to seek assistance in UI redesign or any other modifications to enhance your tool. A simple prompt like, “Hey, could you help me design a cleaner, more professional interface for my tool?” can result in valuable suggestions or even a complete set of customized HTML/CSS code.
Introducing security measures, such as captcha, is a significant enhancement to protect your tool from unwanted bot interactions. Numerous plugins and online resources cater to adding captcha features to your WordPress site.
Continuous optimization, fueled by user feedback, is the cornerstone of making your tool more user-friendly and successful. Embracing the dynamic nature of technology ensures that your tool remains relevant and valuable to its audience.
Bonus: Monetize Your Tools!
WordPress not only enables tool creation and sharing but also provides opportunities for monetization. Whether you’ve developed a single tool or a suite of AI solutions, here are various pathways to monetizing through WordPress:
- Membership Models: Create a members-only section on your site using plugins like ProMembership or MemberPress. These plugins allow tiered memberships with different access levels, offering flexibility in pricing.
- Advertisements and Affiliate Marketing: Monetize through ads or affiliate marketing collaborations with industry partners. Align with relevant advertising networks to generate revenue without direct user charges.
- Freelance Service: Offer your AI tool development service as a freelance gig. Showcase your tools on your WordPress site, serving as a portfolio that demonstrates the quality and capabilities of your work.
- SaaS with WordPress: Combine strategies to build a Software as a Service (SaaS) platform. Utilize plugins, integrate payment gateways, and provide users with a seamless, professional experience.
Monetizing AI tools through WordPress offers a range of options catering to different tools and target audiences. Choose the method that aligns best with your goals and meets the needs of your users.
Stay Updated ⚠️
Stay ahead in the evolving AI and automation landscape by subscribing to my updates. Explore how you can leverage these technologies to amplify your digital marketing and business efforts. I’m here to assist and keep you informed ❤️
